Resource Compass is a searchable directory in Catalyzer that helps organizations connect businesses with funding, advising, training, and other community resources.
Overview
Most organizations manage their resource lists in spreadsheets or shared docs that go stale and require manual upkeep. Resource Compass puts that directory inside Catalyzer, where it stays current and searchable alongside your client and program data.
From the Resource Compass page, you have access to six sections:
- Resources - View and manage active and inactive resources.
- Submitted - Review resources submitted through the public submission process.
- Claims - Manage resource claims from organizations identifying their own listings.
- Flags - Review resources flagged for staff attention
- Edit Requests - Review requests to update information on an existing resource.
- Dashboard - View Resource Compass activity at a glance.
Viewing Resources
The Resources tab displays everything currently in your directory.
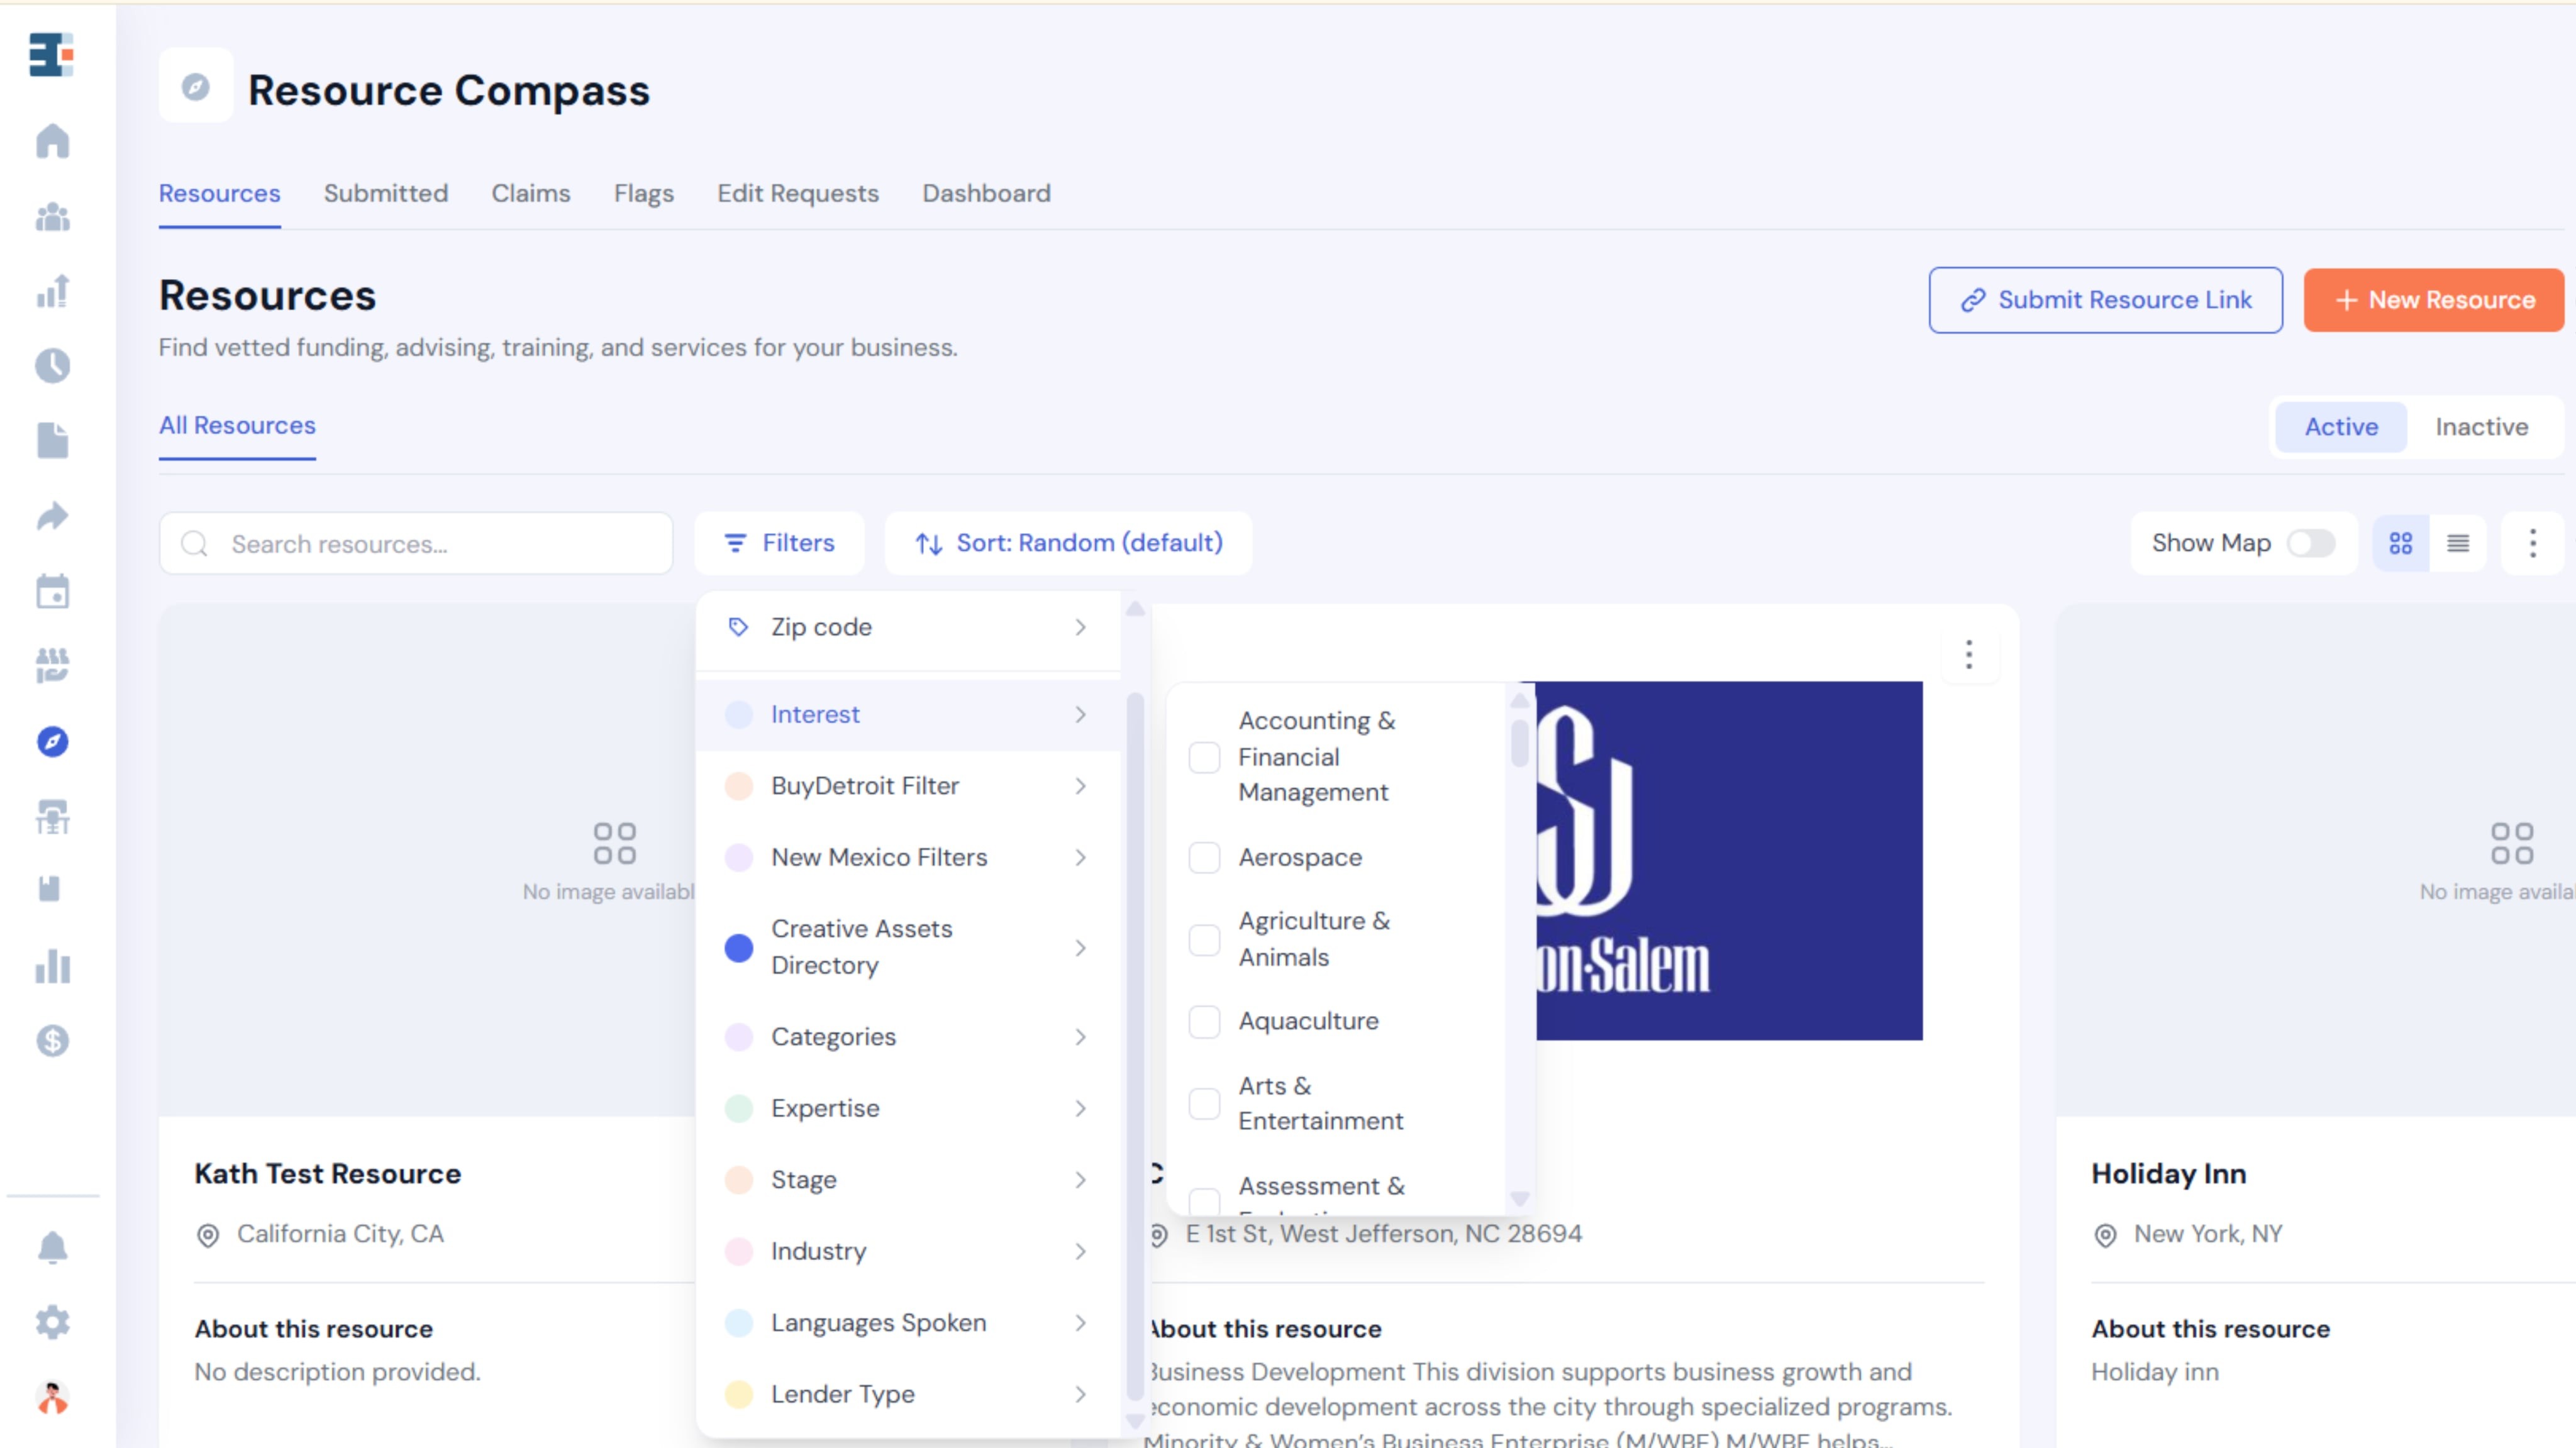
You can search, filter, sort, and switch between three view options: card, list, or map, and view Active or Inactive resources.
Searching for Resources
Searching works through the Search resources field.
Enter a name, keyword, or other relevant term to find matching resources.
How to Customize Resource Compass Filters
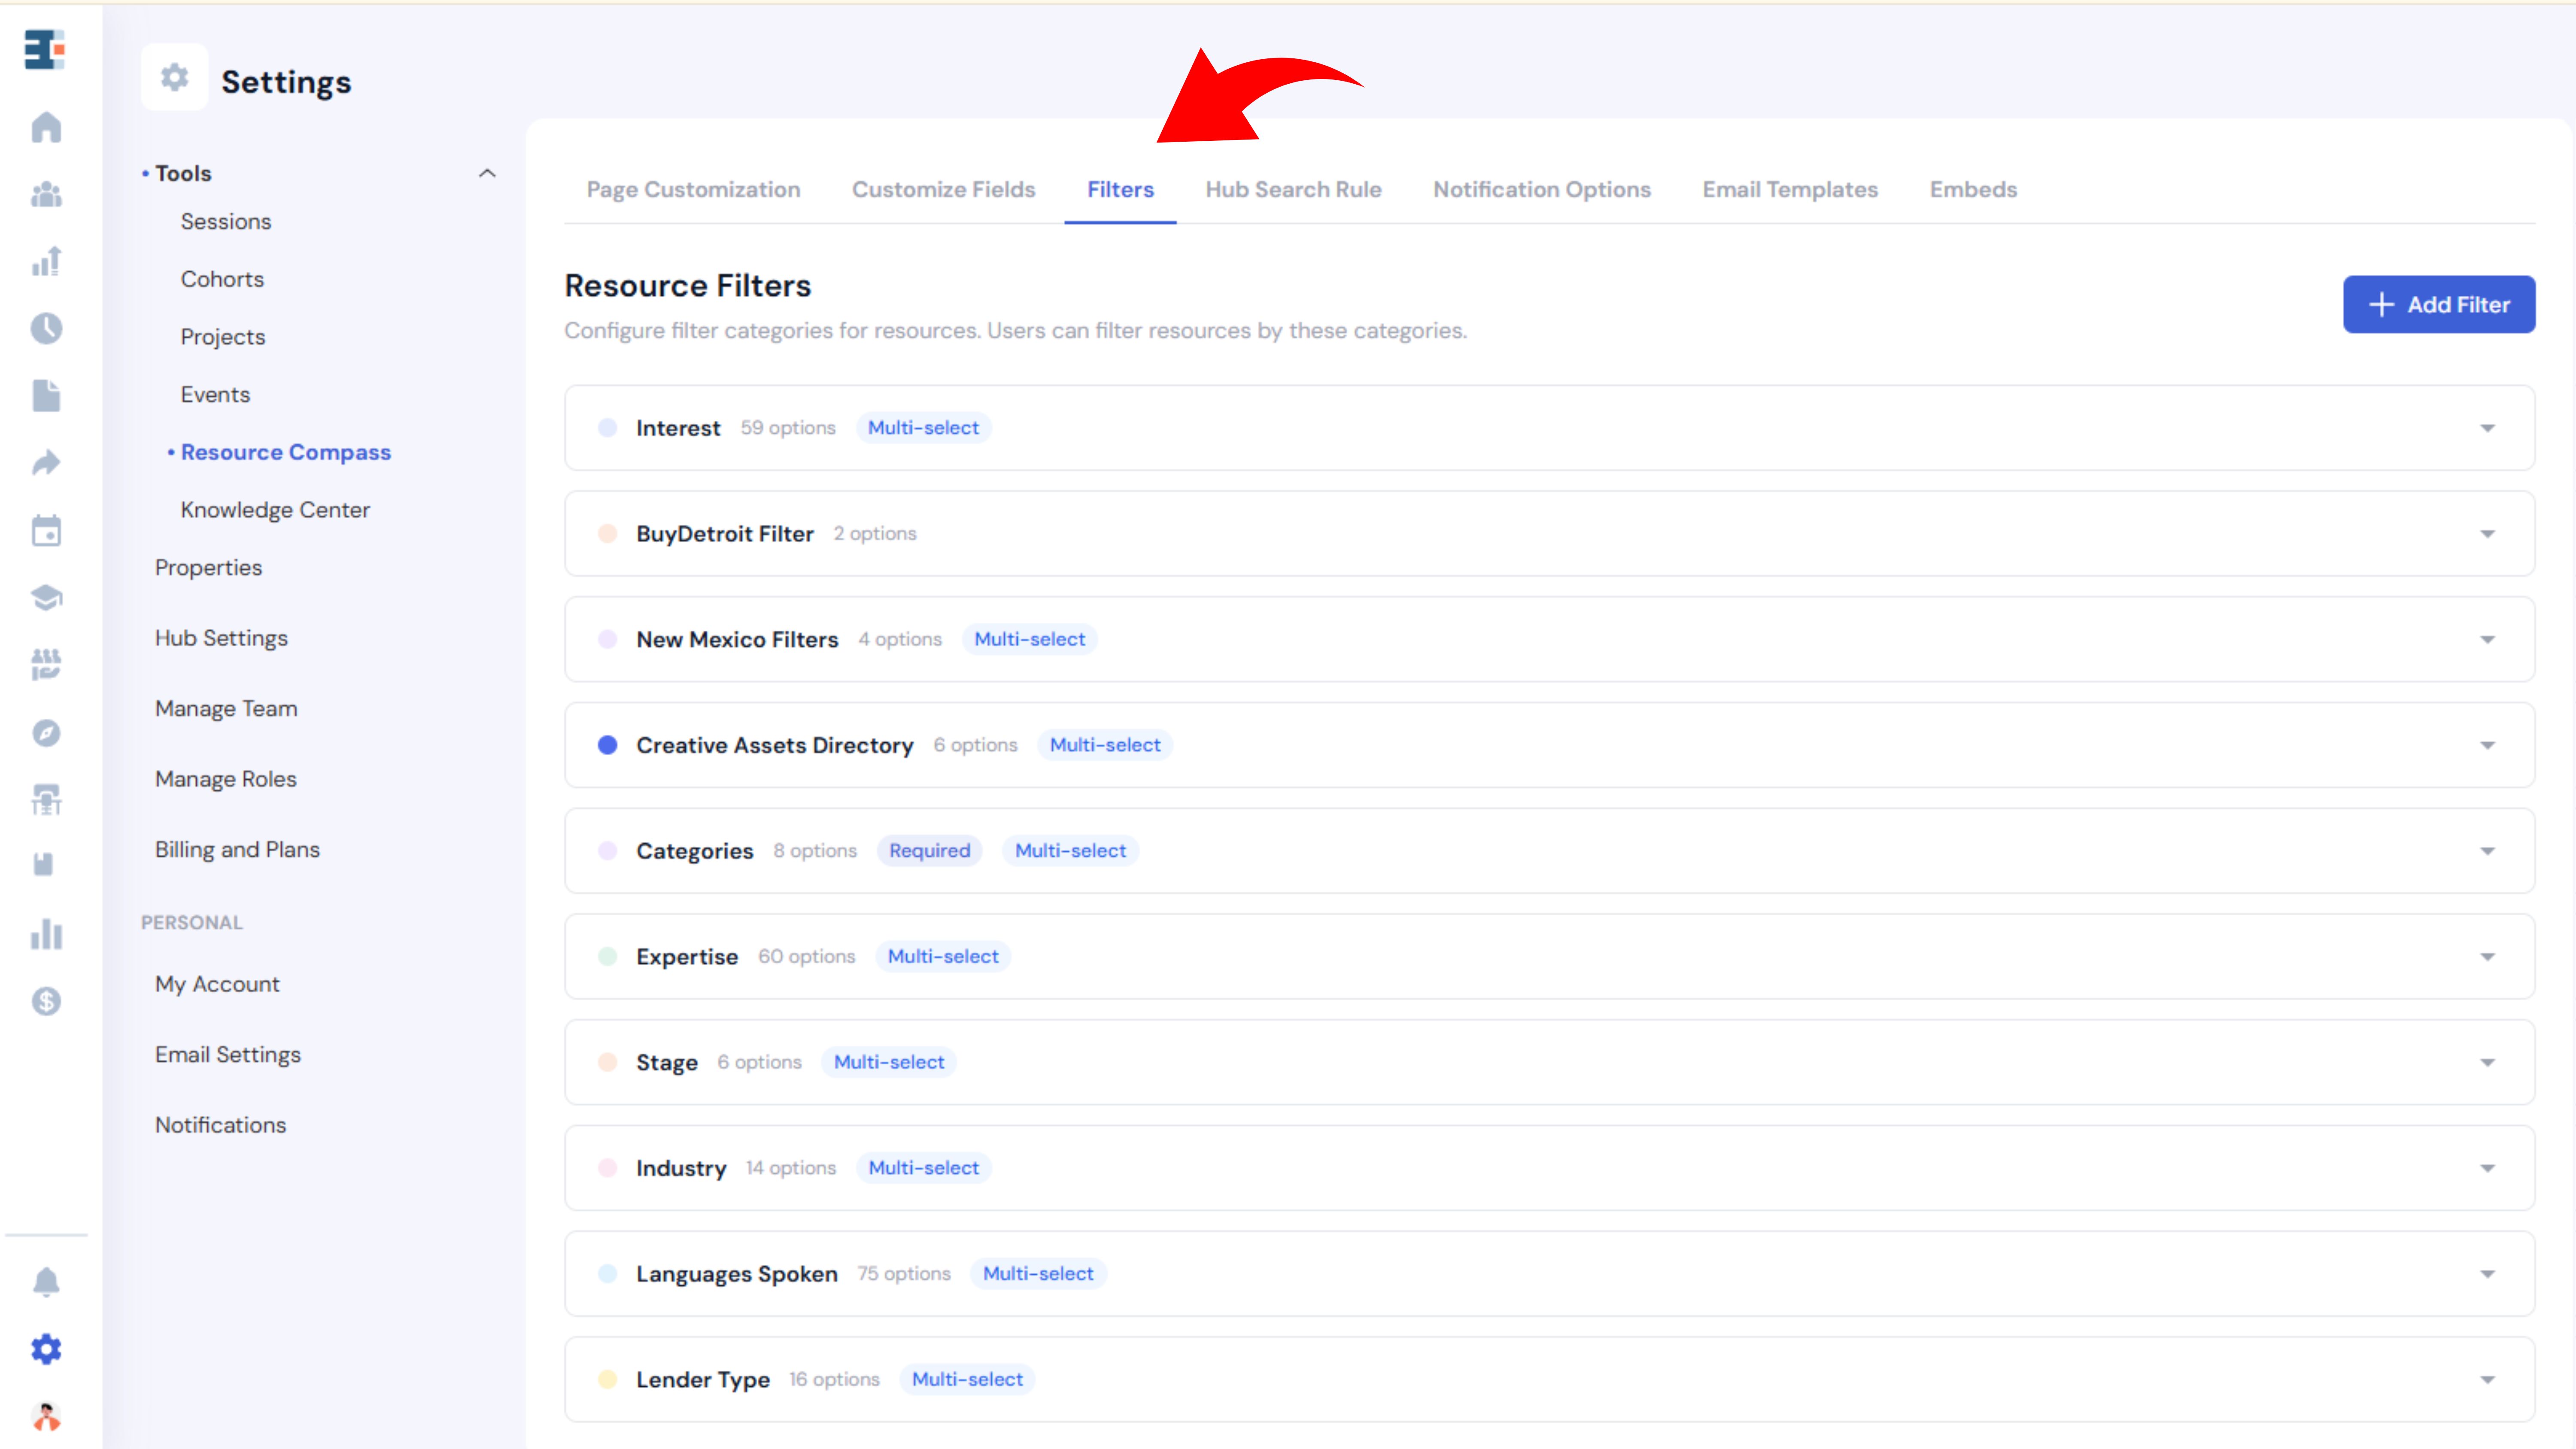
The filters in Resource Compass are configurable. Hub administrators can add, modify, or remove filter categories and options to reflect the specific classifications that make sense for their community.
Accessing Resource Compass Filters
- From the Catalyzer dashboard, select Settings from the left-hand navigation.
- Under Tools, select Resource Compass.
- Select the Filters tab at the top of the page.
The Resource Filters section displays your current filter categories. From here you can view, edit, and manage the options available to staff and businesses when they search the directory.
Sorting Resources
Sorting lets you change the order resources appear. The default is Random, which varies the order each session.
Changing the View
View options give you three ways to look at your directory:
- Card view – presents each resource as an individual card.
- List view -shows resources in a compact row layout.
- Map view – plots resources geographically,
Activated by turning on the Show Map toggle. Map view is especially useful for helping businesses find resources close to them.
Adding a New Resource
To add a resource, select + New Resource from the Resources page.
Basics
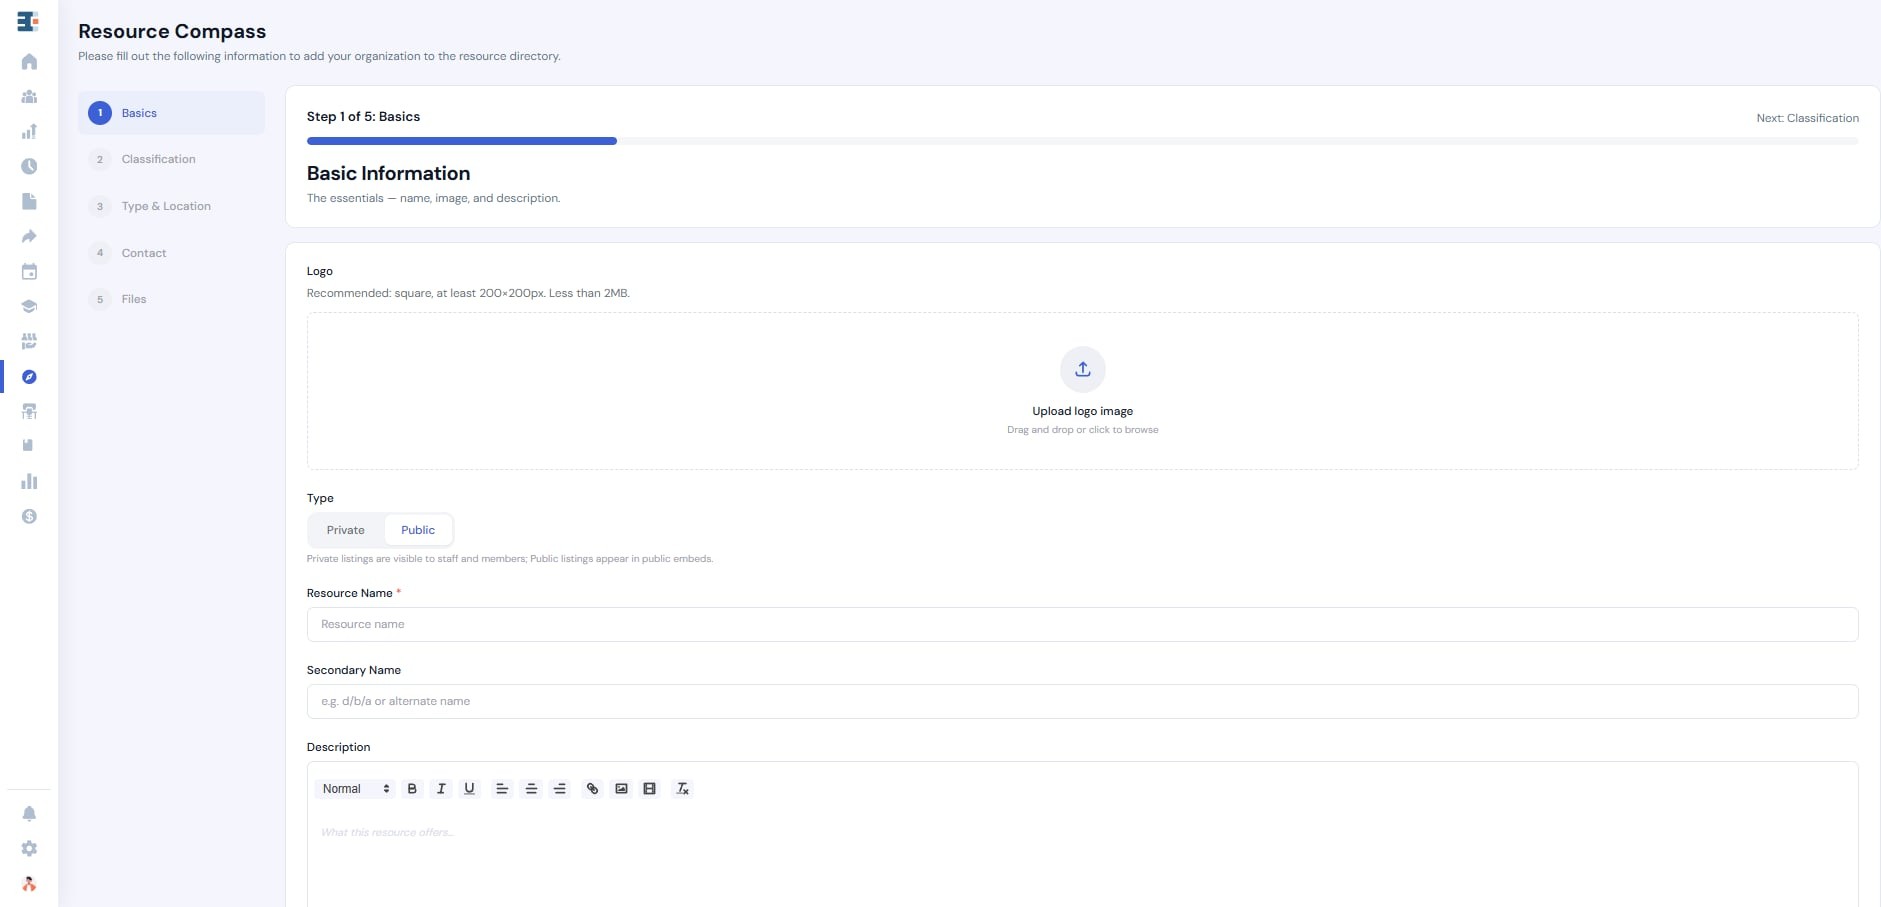
The Basics step collects the core identifying information for the resource.
Logo
Upload the organization's logo.
The recommended format is square, at least 200 × 200 px, and under 2 MB.
Type
Choose whether the resource is:
- Private – Visible to staff and members only.
- Public – Available to the general directory
Resource Name
Enter the primary name of the organization or resource.
Secondary Name
Add an alternate name, abbreviation, or DBA if applicable.
Description
Explain what the resource offers in enough detail that a business owner can determine whether it's a fit for them.
Additional Information
Include anything else useful for evaluating or accessing the resource.
Select Save & Continue to move to the Classification step.
Classification
Classification determines how a resource appears in filtered searches. Each tag you apply is a way for staff and business owners to find the resource when they filter the directory by interest area, industry, stage, or community served.
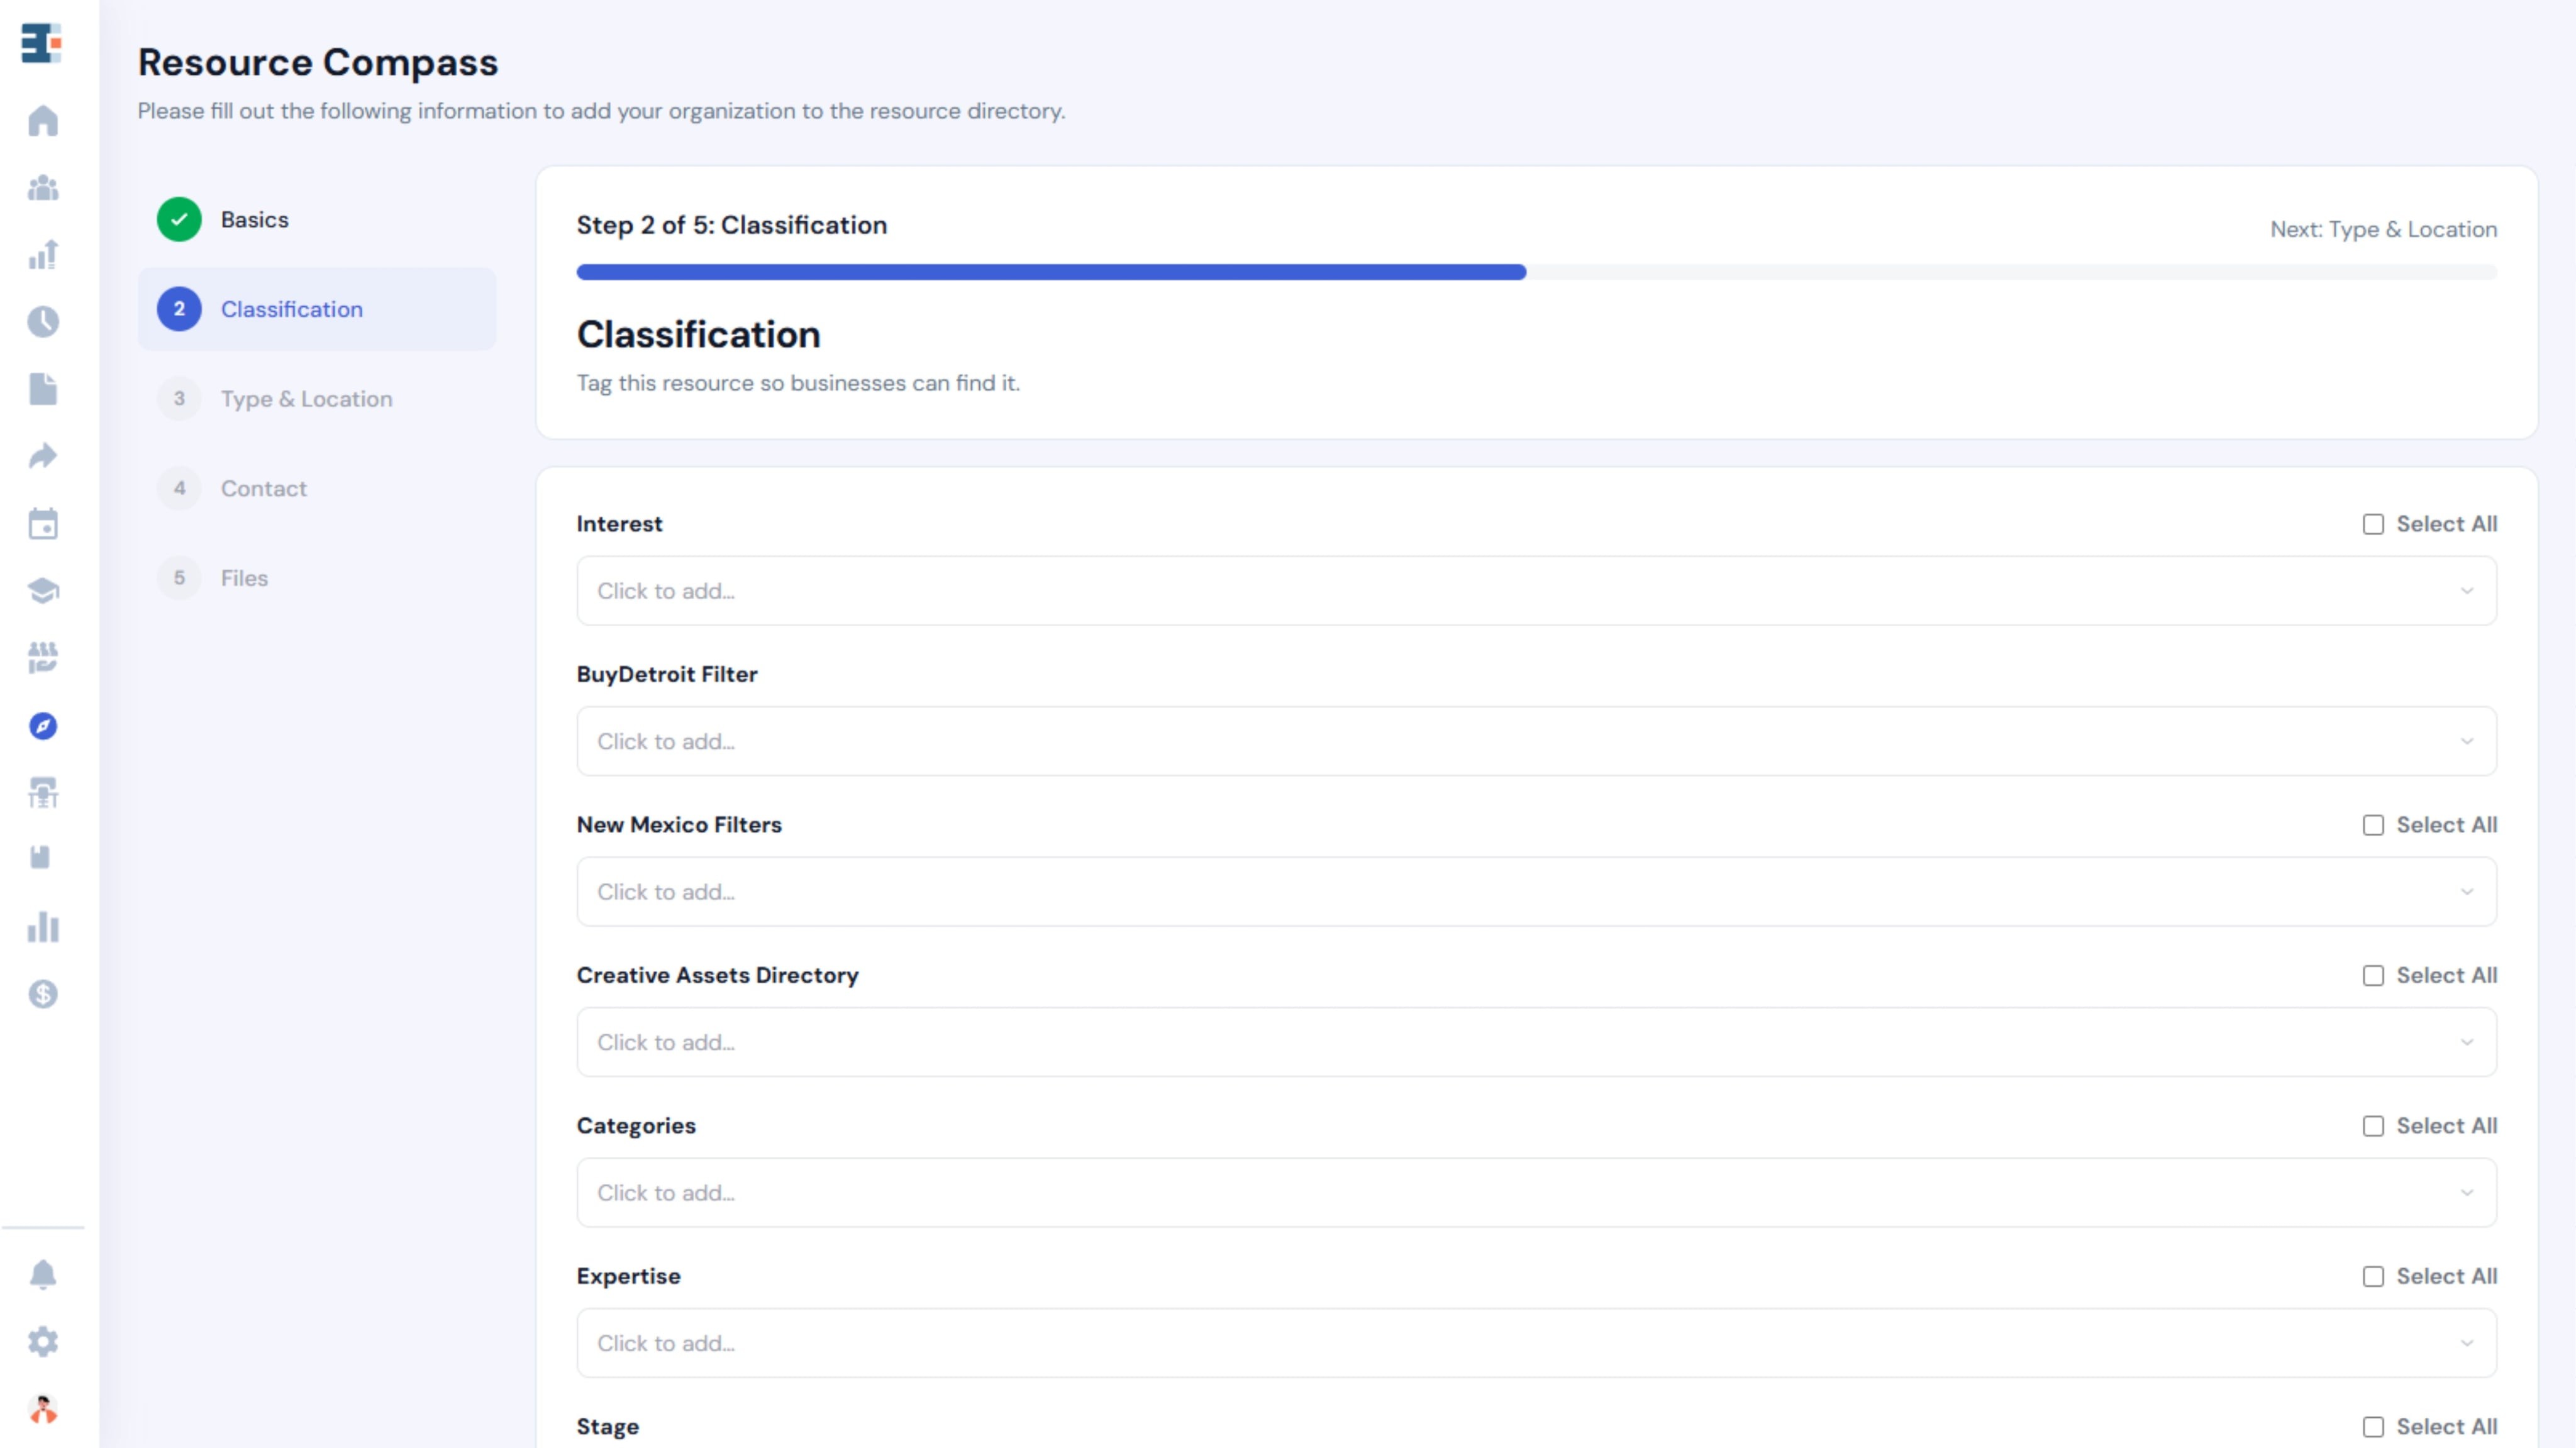
Resource Compass ships with a default set of filters and tags. Your hub's administrator can modify existing options or add new ones to reflect the specific categories your community uses.
💡 The classification options you see may vary depending on how your hub has been configured. If you're missing a category you'd expect, check with your administrator.
Select all tags that accurately describe the resource. Where the option is available, you can choose multiple values within a category or use Select All.
The more precisely a resource is classified, the more reliably it surfaces for the people who need it.
Type & Location
Enter location details for the resource so it can surface in geographic and zip code searches.
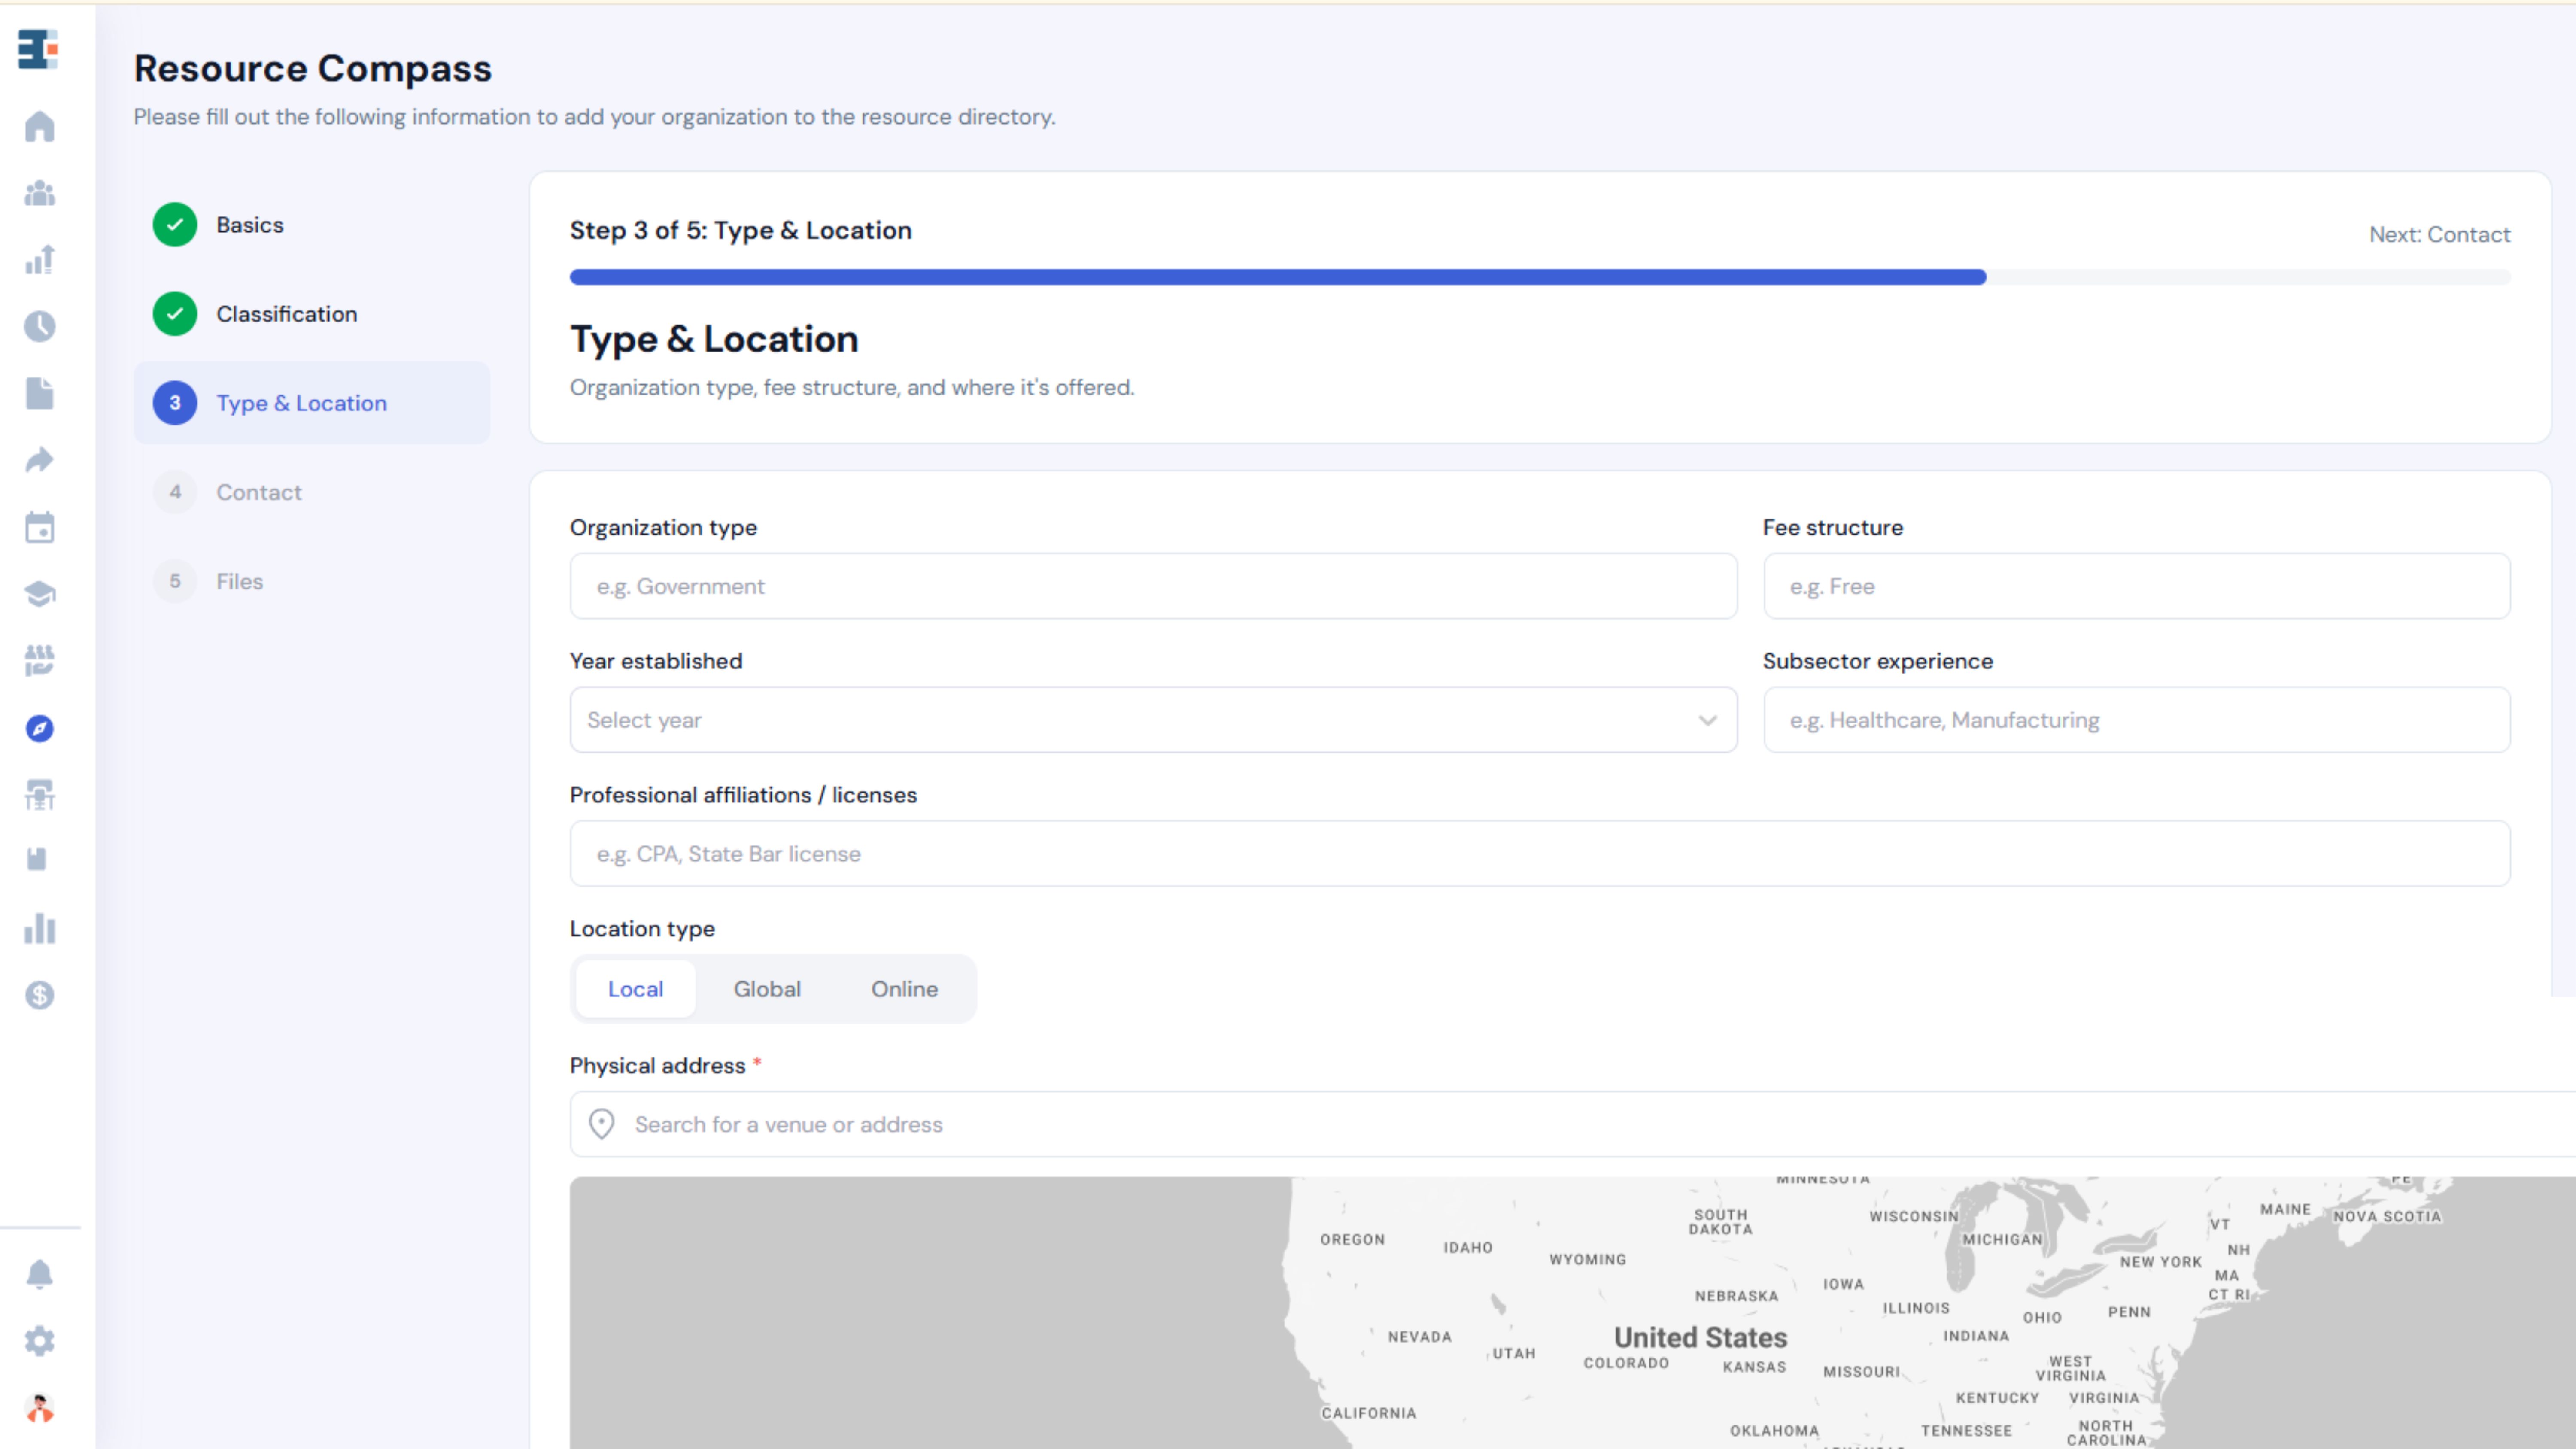
Complete the required fields before continuing.
Contact
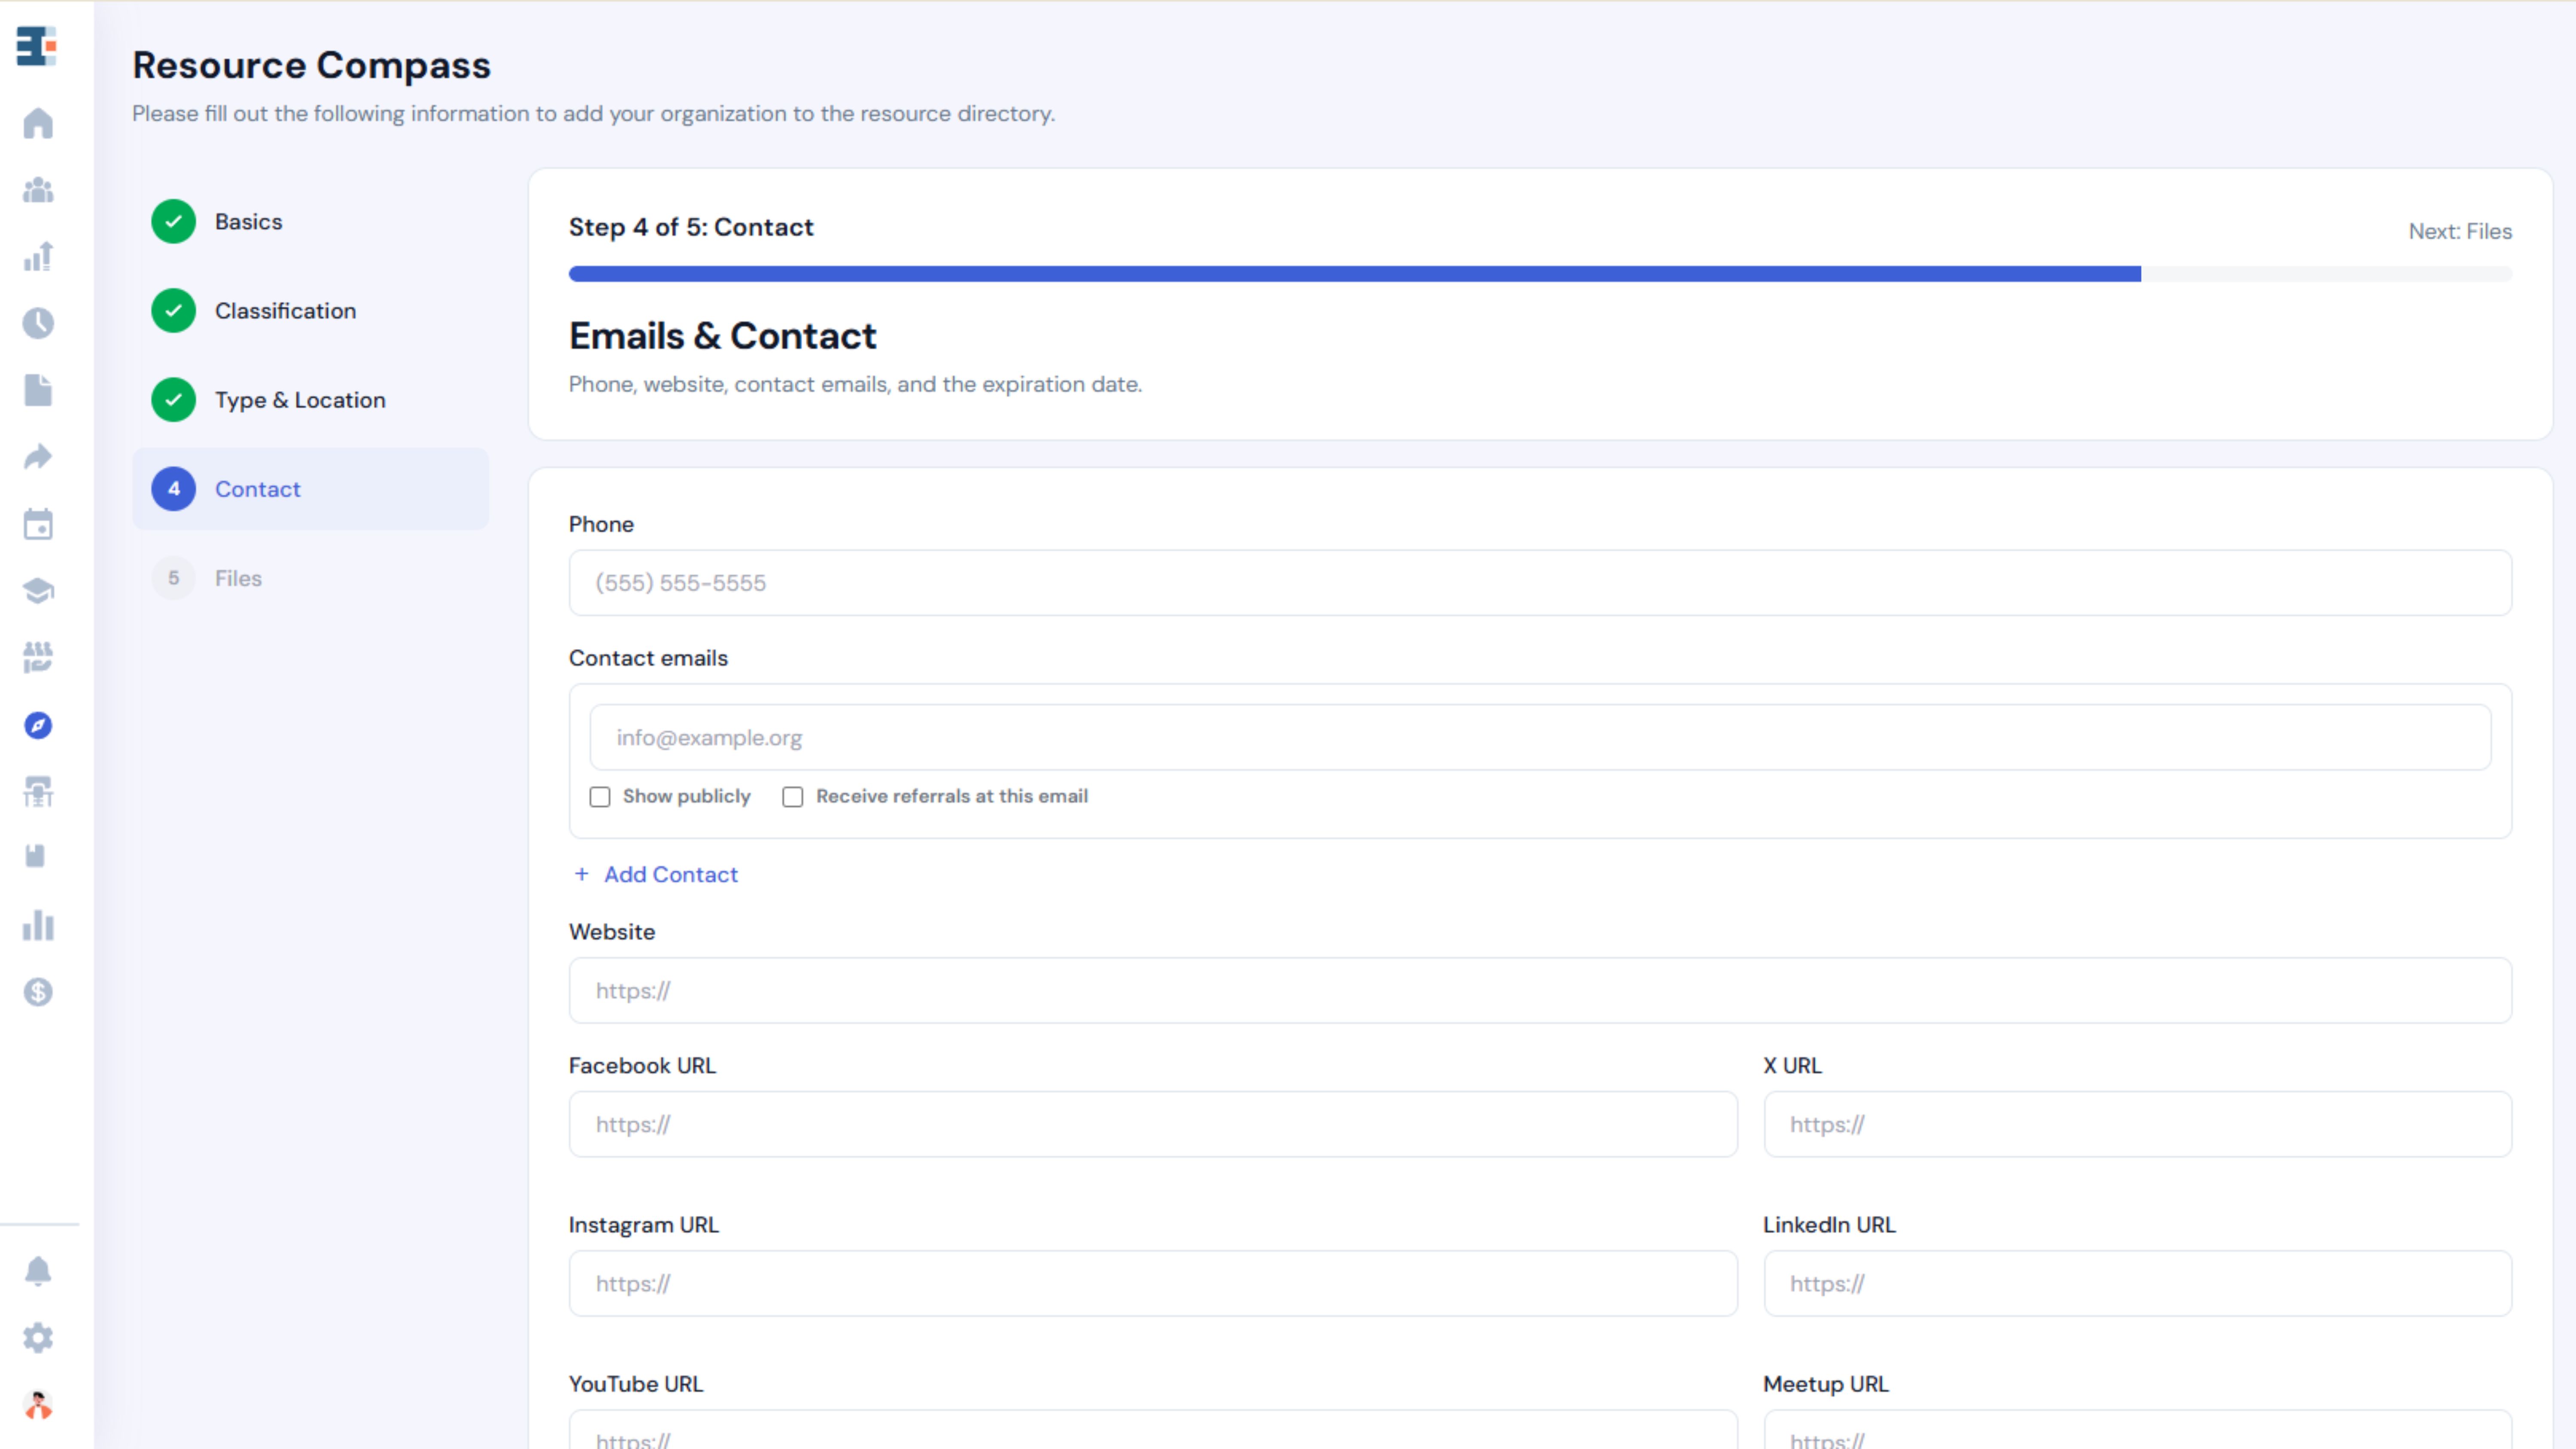
Add the organization's contact information:
- Phone
- Email address
- Website, and
- Any other available contact details
Double-check this information before saving. It's the path a business owner takes to actually reach the resource.
Select Save & Continue to proceed to the Files section.
Files
Upload any supporting documents associated with the resource. Review all information before finishing.
Managing Existing Resources
Resource Compass includes several tools for keeping your directory current.
Submitted Resources
Submitted resources come in through a public submission process.
The Submitted tab is where you review them and decide whether to add them to the directory.
Claims
Claims allow organizations to identify or claim their own listing.
The Claims tab is where you manage those requests.
Flags
Flags mark resources that need attention, whether for outdated information, inaccuracies, or another reason.
Review flagged resources in the Flags tab and determine whether an update or other action is needed.
Edit Requests
Edit Requests capture requests to update an existing resource's information.
Review each request in the Edit Requests tab and apply the changes when appropriate.
Dashboard
The Dashboard gives you an overview of Resource Compass activity: submissions received, claims, flags, and other directory metrics at a glance.
Active and Inactive Resources
Resources can be set to Active or Inactive.
Use the status tabs on the Resources page to toggle between them.
Marking a resource Inactive removes it from public view without deleting the record. This is the right choice when a resource is temporarily unavailable or no longer relevant but you want to retain the information for reference.
Key Takeaway
Properly classifying each resource is the highest-leverage thing you can do when building your directory. The more accurately resources are tagged, the more useful the directory becomes for the businesses and staff who rely on it to find the right support.